Introduction to Docker
What is Docker?
Docker is a container engine that allows you to build, test and deploy applications quickly in a consistent format. It simplifies everything by including all the system libraries, system tools, code and runtime in a container that can be run on any platform that supports Docker.
This means that you’re able to install Docker on your choice of platform, and any container you run will behave the same across all of them, rather than be platform dependent. Linux is a very well supported platform in this regard, so many containers will work consistently across many distributions. The main outlier is Windows, where it uses the Windows Subsystem for Linux (WSL), which uses virtualisation whereas Docker on Linux does not require it.
I won't be going over the nitty gritty stuff about Docker as it is out of scope, however there are videos you can find that will.
I also do have a YouTube video that is loosely based off this post for anyone who may find it useful.
Prerequisites
- An installed Linux distribution of your choice
- A basic understanding of Linux and the terminal
- A text editor or IDE like Visual Studio Code
Installing Docker
Installing Docker varies from distribution to distribution, so I'll go over most of the common distributions.
Arch Linux
Docker is in Arch's extra repository.
Debian
Debian does have Docker in its repositories by default, however they are usually out of date due to the release cycles. Depending on the release of Debian you have, it could be missing features and any critical fixes, so I do not recommend installing it from the default repositories. In order to install it from Docker's own repository, we’ll need to add Docker’s apt repository.
# Add Docker's official GPG key:
sudo apt-get update
sudo apt-get install ca-certificates curl
sudo install -m 0755 -d /etc/apt/keyrings
sudo curl -fsSL https://download.docker.com/linux/debian/gpg -o /etc/apt/keyrings/docker.asc
sudo chmod a+r /etc/apt/keyrings/docker.asc

# Add the repository to Apt sources:
echo \
  "deb [arch=$(dpkg --print-architecture) signed-by=/etc/apt/keyrings/docker.asc] https://download.docker.com/linux/debian \
  $(. /etc/os-release && echo "$VERSION_CODENAME") stable" | \
  sudo tee /etc/apt/sources.list.d/docker.list > /dev/null
sudo apt-get update
That should allow us to install Docker and its other packages with apt:
sudo apt-get install docker-ce docker-ce-cli containerd.io dockerx-buildx-plugin docker-compose-plugin
Note
More information can be found here.
Ubuntu
Ubuntu is in a similar situation as Debian in this regard, so the process to install it is largely the same.
# Add Docker's official GPG key:
sudo apt-get update
sudo apt-get install ca-certificates curl
sudo install -m 0755 -d /etc/apt/keyrings
sudo curl -fsSL https://download.docker.com/linux/ubuntu/gpg -o /etc/apt/keyrings/docker.asc
sudo chmod a+r /etc/apt/keyrings/docker.asc

# Add the repository to Apt sources:
echo \
  "deb [arch=$(dpkg --print-architecture) signed-by=/etc/apt/keyrings/docker.asc] https://download.docker.com/linux/ubuntu \
  $(. /etc/os-release && echo "${UBUNTU_CODENAME:-$VERSION_CODENAME}") stable" | \
  sudo tee /etc/apt/sources.list.d/docker.list > /dev/null
sudo apt-get update
That should allow us to install Docker and its other packages with apt:
sudo apt-get install docker-ce docker-ce-cli containerd.io docker-buildx-plugin docker-compose-plugin
Note
More information can be found here.
Docker should now be installed and runnable. For an easy test to make sure the installation was successful, we can run the hello-world image.
To test Docker and make sure it works after our installation, we can use the hello-world image:
You should get an output like this below.
Unable to find image 'hello-world:latest' locally
latest: Pulling from library/hello-world
e6590344b1a5: Pull complete
Digest: sha256:940c619fbd418f9b2b1b63e25d8861f9cc1b46e3fc8b018ccfe8b78f19b8cc4f
Status: Downloaded newer image for hello-world:latest

Hello from Docker!
This message shows that your installation appears to be working correctly.

To generate this message, Docker took the following steps:
 1. The Docker client contacted the Docker daemon.
 2. The Docker daemon pulled the "hello-world" image from the Docker Hub.
    (amd64)
 3. The Docker daemon created a new container from that image which runs the
    executable that produces the output you are currently reading.
 4. The Docker daemon streamed that output to the Docker client, which sent it
    to your terminal.

To try something more ambitious, you can run an Ubuntu container with:
 $ docker run -it ubuntu bash

Share images, automate workflows, and more with a free Docker ID:
 https://hub.docker.com/

For more examples and ideas, visit:
 https://docs.docker.com/get-started/
If you did, congratulations, you’ve got Docker installed and running.
Using Docker
Running a container
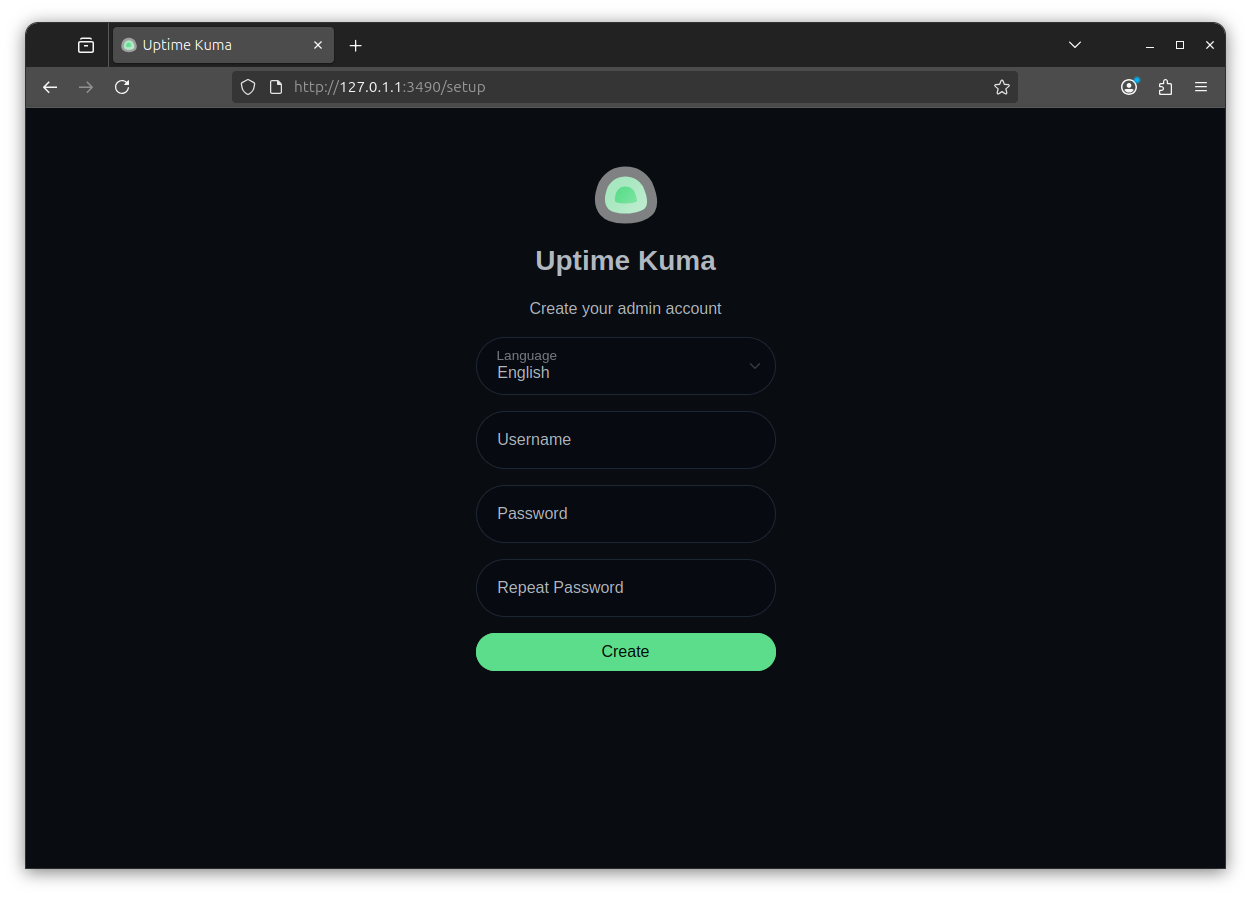
As the output of our previous command shows, Docker is installed and running correctly. Now we'll install a simple service in Docker called uptime-kuma.
sudo docker run -d --restart=always -p 3001:3001 -v uptime-kuma:/app/data --name uptime-kuma louislam/uptime-kuma:1
Once the container is started and running, you should be able to go to your web browser and visit uptime-kuma using your PC’s IP address and the port. So in my case, it will be 192.168.0.175:3001. The easiest way to find your IP address is by running:
Commands in Docker
Now we've got a container set up, we can go through some of the common commands you'll use in Docker.
docker ps- This shows you any running containers, the images they are using, commands, and more. In this instance, we haveuptime-kuma, as shown:
CONTAINER ID   IMAGE                    COMMAND                  CREATED        STATUS                   PORTS                                         NAMES
73aa925a1024   louislam/uptime-kuma:1   "/usr/bin/dumb-init …"   2 minutes ago  Up 2 minutes (healthy)   0.0.0.0:3001->3001/tcp, [::]:3001->3001/tcp   uptime-kuma
-
docker run- This will pull (if not already pulled) and start a container with the specified image and any arguments passed through with it, such as volumes and exposed ports. Going through the arguments of our command foruptime-kuma:-
-d– meaning detach from the terminal and run in the background. -
--restart=always– always restarts the container if it stops, unless manually stopped. -
-p 3001:3001– This binds port 3001 in the container to 3001 in the host. The left side is the host, while the right side is the container. This helps prevent any port conflicts if more than one program was to try use the same port, as an example. In this instance, if we were to change the left side to 9091, then the container port 3001 would be exposed on the host port 9091. -
-v uptime-kuma:/app/data- this mounts a volume called uptime-kuma on the host (generally in /var/lib/docker/volumes unless specified) in /app/data in the container. Any files within that volume are accessible on the host and the container. -
--name uptime-kuma– sets the name of the container. -
louislam/uptime-kuma:1– this sets the image or “base” of the container, in this case it’s uptime-kuma. The :1, called the tag, represents which version of the image to be pulled. You can find a list of all possible tags on the Docker Hub page for it here.
-
-
docker stop [container_name]- This starts any container that is currently stopped. The value of[container_name]should be the container name, so with the output fromdocker ps, we know it'suptime-kuma:sudo docker stop uptime-kuma -
docker start [container_name]- same as above, except for stopping a container. -
docker restart [container_name]- Same as above, except for restarting a container. -
docker rm [container_name]- Deletes the container you define. -
docker port [container_name]- Shows port mappings for a container. -
docker pull [image]- Pulls the image specified. By default it will pull fromdocker.io, Docker's registry of containers. Pulling from other registries is also possible, as we will discuss later. -
docker exec- Allows you to execute a command inside a container, for example, opening a interactive shell to issue commands. For example, to get an interactive Bash shell inuptime-kuma,sudo docker exec -it uptime-kuma /bin/bashcan be used:
Info
More information of these commands can be found by using docker --help to list all commands, and docker [command] --help for information on the command you specify. Docker also lists these commands and any environment variables on their site here as well. A cheatsheet provided by Docker themselves may also help.
Docker Compose
There is a more declarative way of defining containers in Docker, and that’s through the use of Docker Compose. It uses YAML configuration files to define container arguments, which means it is much easier to make changes if required, such as changing published ports, volumes or image tags. Most projects will provide you with an example docker-compose.yml file, which you can download and edit to your use case.
Setting up a simple Compose environment
Uptime Kuma is an application that tracks the status of
First, we will need to put the Compose file into its own directory, as Docker Compose uses the directory you are in as its working directory. The location of the directory doesn’t matter, but I’ll put it in /services for consistency's sake. Make a new directory in /services and call it uptime-kuma, and cd into it:
Download the docker-compose.yml file into it:
wget https://raw.githubusercontent.com/louislam/uptime-kuma/refs/heads/1.23.X/docker/docker-compose.yml
and open it in your editor of choice. In my case, it is vim:
The file should look similar to this:
# Simple docker-compose.yml
# You can change your port or volume location

version: '3.3'

services:
  uptime-kuma:
    image: louislam/uptime-kuma:1
    container_name: uptime-kuma
    volumes:
      - ./uptime-kuma-data:/app/data
    ports:
      - 3001:3001  # <Host Port>:<Container Port>
    restart: always
Between the docker run command and the Compose file, you will notice a lot of similarities. The major difference is that all of the arguments can be easily changed here without having to remove and create the container for every change. The volume is also stored in the directory the docker-compose.yml file is in, as opposed to /var/lib/docker/volumes (as defined by the ./) by default. This means if there is a configuration file for the container, it can be edited without entering the container at all.
Starting a Compose stack
For now, we won't make any changes, and we'll close the file out of the editor. To start a Compose container, run:
and if you get an output like this:
user@Ubuntu-KVM:/services/uptime-kuma$ sudo docker compose up -d
WARN[0000] /services/uptime-kuma/docker-compose.yml: the attribute `version` is obsolete, it will be ignored, please remove it to avoid potential confusion
[+] Running 2/2
 ✔ Network uptime-kuma_default  Created                                                              0.2s
 ✔ Container uptime-kuma        Started
the container should be starting and accessible through port 3001 once started:
but in case you have may have a port conflict and you need to change the port it’s accessible to, we stop the container:
open docker-compose.yml in your editor, and change the left side of the port argument:
to:
save the file, and start the container again:
and just like that, it should be accessible on the port you specified:
and as a little extra, if we have a look at the uptime-kuma-data folder created by the container, you may see that it has files in it:
user@Ubuntu-KVM:/services/uptime-kuma$ eza -l uptime-kuma-data/
drwxr-xr-x    - root 26 Jun 19:12 docker-tls
.rwxr-xr-x 233k root 27 Jun 13:15 kuma.db
.rwxr-xr-x  33k root 27 Jun 13:15 kuma.db-shm
.rwxr-xr-x  12k root 27 Jun 13:14 kuma.db-wal
drwxr-xr-x    - root 26 Jun 19:12 screenshots
drwxr-xr-x    - root 26 Jun 19:12 upload
This is the data of uptime-kuma, where all the data is stored for it. You can take this folder, setup an uptime-kuma container on another machine and point the volume to the data folder, and it’ll be exactly as you had everything set up on the initial machine. This makes migration to a different system much easier than it would be otherwise. This again shows that the image is just the base of the container, while the variable things are in volumes, which are directories on the host.
Setting up a more complex Docker Compose stack
One container on its own is called a container, but a group of them is called a stack. Some applications through Docker will have a stack of containers for other services, such as databases or webservers. An example of one I will demonstrate here is Immich, a self-hosted photo and backup solution. Think of Google Photos but self-hosted, that’s Immich for you.
We’ll do a similar thing with Immich as we did with uptime-kuma, in that we had a separate directory that stored docker-compose.yml, any environment files and volumes. We’ll create our directory for Immich and change into it:
Download the appropriate docker-compose.yml and .env file:
wget -O docker-compose.yml https://github.com/immich-app/immich/releases/latest/download/docker-compose.yml
wget -O .env https://github.com/immich-app/immich/releases/latest/download/example.env
And open docker-compose.yml in our text editor:
#
# WARNING: To install Immich, follow our guide: https://immich.app/docs/install/docker-compose
#
# Make sure to use the docker-compose.yml of the current release:
#
# https://github.com/immich-app/immich/releases/latest/download/docker-compose.yml
#
# The compose file on main may not be compatible with the latest release.

name: immich

services:
  immich-server:
    container_name: immich_server
    image: ghcr.io/immich-app/immich-server:${IMMICH_VERSION:-release}
    # extends:
    #   file: hwaccel.transcoding.yml
    #   service: cpu # set to one of [nvenc, quicksync, rkmpp, vaapi, vaapi-wsl] for accelerated transcoding
    volumes:
      # Do not edit the next line. If you want to change the media storage location on your system, edit the value of UPLOAD_LOCATION in the .env file
      - ${UPLOAD_LOCATION}:/usr/src/app/upload
      - /etc/localtime:/etc/localtime:ro
    env_file:
      - .env
    ports:
      - '2283:2283'
    depends_on:
      - redis
      - database
    restart: always
    healthcheck:
      disable: false

  immich-machine-learning:
    container_name: immich_machine_learning
    # For hardware acceleration, add one of -[armnn, cuda, rocm, openvino, rknn] to the image tag.
    # Example tag: ${IMMICH_VERSION:-release}-cuda
    image: ghcr.io/immich-app/immich-machine-learning:${IMMICH_VERSION:-release}
    # extends: # uncomment this section for hardware acceleration - see https://immich.app/docs/features/ml-hardware-acceleration
    #   file: hwaccel.ml.yml
    #   service: cpu # set to one of [armnn, cuda, rocm, openvino, openvino-wsl, rknn] for accelerated inference - use the `-wsl` version for WSL2 where applicable
    volumes:
      - model-cache:/cache
    env_file:
      - .env
    restart: always
    healthcheck:
      disable: false

  redis:
    container_name: immich_redis
    image: docker.io/valkey/valkey:8-bookworm@sha256:fec42f399876eb6faf9e008570597741c87ff7662a54185593e74b09ce83d177
    healthcheck:
      test: redis-cli ping || exit 1
    restart: always

  database:
    container_name: immich_postgres
    image: ghcr.io/immich-app/postgres:14-vectorchord0.4.3-pgvectors0.2.0
    environment:
      POSTGRES_PASSWORD: ${DB_PASSWORD}
      POSTGRES_USER: ${DB_USERNAME}
      POSTGRES_DB: ${DB_DATABASE_NAME}
      POSTGRES_INITDB_ARGS: '--data-checksums'
      # Uncomment the DB_STORAGE_TYPE: 'HDD' var if your database isn't stored on SSDs
      # DB_STORAGE_TYPE: 'HDD'
    volumes:
      # Do not edit the next line. If you want to change the database storage location on your system, edit the value of DB_DATA_LOCATION in the .env file
      - ${DB_DATA_LOCATION}:/var/lib/postgresql/data
    restart: always

volumes:
  model-cache:
As you may see this Compose file is much larger than the likes of Uptime Kuma, and here we see multiple containers in the same file. So, this is a “stack”. In this stack we have, going from top to bottom:
-
The
immich_servercontainer, this is the main Immich application. Most arguments we change in this stack will relate to this container, as almost everything for Immich will go through here. This container's volume is where your library of photos and videos, so you may have this point to a separate drive, as an example. -
immich_machine_learning, which is used for things such as Smart Search, Facial Recognition and Duplicate Deletion, all of which runs locally and never has to connect to the internet. This container has its own volume. -
immich_redisandimmich_postgres, which are database containers to hold data about photos, videos and whatever Immich requires. Although onlydatabasehas a volume defined, we can define one forredisand have it stored in./volumes/.
Editing the compose stack
Note for all the volumes apart from redis, they all have a variable for the path on the host, so we'll replicate that for redis as well:
...
  redis:
    container_name: immich_redis
    image: docker.io/valkey/valkey:8-bookworm@sha256:fec42f399876eb6faf9e008570597741c87ff7662a54185593e74b09ce83d177
    volumes:
      - ${DB_REDIS_LOCATION}/:/data
    healthcheck:
      test: redis-cli ping || exit 1
    restart: always
...
Editing the .env file
# You can find documentation for all the supported env variables at https://immich.app/docs/install/environment-variables

# The location where your uploaded files are stored
UPLOAD_LOCATION=./volumes/library

# The location where your database files are stored. Network shares are not supported for the database
DB_DATA_LOCATION=./postgres

# To set a timezone, uncomment the next line and change Etc/UTC to a TZ identifier from this list: https://en.wikipedia.org/wiki/List_of_tz_database_time_zones#List
# TZ=Australia/NSW

# The Immich version to use. You can pin this to a specific version like "v1.71.0"
IMMICH_VERSION=release

# Connection secret for postgres. You should change it to a random password
# Please use only the characters `A-Za-z0-9`, without special characters or spaces
DB_PASSWORD=postgres

# The values below this line do not need to be changed
###################################################################################
DB_USERNAME=postgres
DB_DATABASE_NAME=immich
We'll add the volume variable we created for immich_redis in here, and change them to reflect our directory structure:
...
# The location where your uploaded files are stored
UPLOAD_LOCATION=./volumes/library

# The location where your database files are stored. Network shares are not supported for the database
DB_DATA_LOCATION=./volumes/postgres

DB_REDIS_LOCATION=./volumes/redis
...
Many applications will have an environment file such as the one above, and it's used to change certain variables of the application. Some other applications may have the variables in the Compose file itself as well, so it's best to check when you set a stack up. Do note that you can always create an environment file yourself and replace fixed variables in the Compose file out for the environment file.
Starting the Immich stack
Save, close it out and sudo docker compose up -d. It should start up, and be accessible on your IP address with port 2283, so in my case, 127.0.1.1:2283. If it's working, you should get a page like this:

All these containers need to be able to communicate with each other, at least immich-server to the rest. So the question is: how? Well, this is where the networking side comes in.
Networking in Docker
Virtual networks
Networking in Docker (for the most part) relies on virtual adapters assigned to a container or stack, which does not give you direct access to the containers from the host without exposing a port. This is generally done for security reasons, and it also helps prevent conflicts between other stacks. For example here with Immich running, this is the list of network adapters on the host:
I've highlighted the main focuses of this output.
You can see that we have our physical adapter on line 8 (enp1s0 in my case), and then two "bridge" adapters on line 19 and 25. This is how it appears on the host. To the host, it only sees the one IP address for each bridge adapter called the gateway address, but to the stack, each container has its own individual IP address. Now, let's look at how the containers see the network with sudo docker network inspect:
We primarily want to look at the containers here, in this case, it's immich_server, immich_machine_learning, immich_redis and immich_postgres. Line 16-17 show the gateway of the network, whose address is also the same as one of the bridge adapters shown earlier. Any traffic going from container to host or vice versa has to go through the gateway, which means the containers are not directly connected to the host. You can't access 172.18.0.5 from the host as an example, as it does not see it. The containers have IP addresses within the range of the subnet defined, so 172.18.0.0/16 in our instance. Lines 33, 40 and 54 represent this.
Publishing ports
How containers are accessible to the host is by publishing a port, like what we did for Uptime Kuma and Immich. It makes a port inside a container accessible outside of the virtual network. For example, if I did a port definition of 2345:5432, port 5432 in the container will be accessible on the host's IP address at 2345. The virtual network essentially acts like a firewall for containers.
Host Network
You can also set up a container to use the Host network mode, where there is no isolation between the containers and the host network. It gives the container direct access to the host network, so if there is a port it requires, it will attempt to use it with no way to re-route it compared to the bridge mode. There's a few other modes as well, which can be viewed here. For most cases, bridge and host will be used.
GPU Acceleration
GPU acceleration is possible through Docker, although depending on your hardware it may require a few more steps to achieve it.
AMD/Intel GPUs
AMD and Intel GPUs are the easiest of the big three, it just requires you to pass the GPU device into the container where it would expect it. On my system with a GTX 1070 and an RX 6700XT, to find out which GPU to use we can run ls -l /sys/class/drm/renderD*/device/driver:
ls -l /sys/class/drm/renderD*/device/driver
lrwxrwxrwx 1 root root 0 Oct  7 18:33 /sys/class/drm/renderD128/device/driver -> ../../../../../../bus/pci/drivers/amdgpu
lrwxrwxrwx 1 root root 0 Oct  7 18:33 /sys/class/drm/renderD129/device/driver -> ../../../../../../bus/pci/drivers/nvidia
The end of the paths tell us what GPU is what here. We'll pass through the RX6700XT, which is renderD128.
Frigate also requires you to define the LIBVA driver, which I've included in the .env file here.
LIBVA_DRIVER_NAME=radeonsi    # For AMD GPUs
# LIBVA_DRIVER_NAME=i965      # For older Intel GPUs
# LIBVA_DRIVER_NAME=iHD       # For newer Intel GPUs
NVIDIA GPUs
As to be expected with NVIDIA, passing their GPUs through requires more of an initial setup. First you'll need the NVIDIA Container Toolkit to be able to pass the GPU to the container. On Arch Linux, you can install the package nvidia-container-toolkit. You'll need to look at NVIDIA's website for your specific distribution, as it varies. Then, run the following commands:
Then, add the highlighted lines to your container. Again, I'm using Frigate as an example here.
You should be able to restart your container and have your NVIDIA GPU passed through sucessfully.
Volume Permissions
Volume permissions in Docker are affected by the container and what user was used from the container. We'll take Immich for example.
.rw-r--r-- 2.8k jeames8kin  6 Oct 15:09 docker-compose.yml
drwxr-xr-x    - root        6 Oct 15:08 library
drwx------    - 999         6 Oct 15:08 postgres
drwxr-xr-x    - 999         7 Oct 19:44 redis
Docker by default runs as root, so any files and folders it creates will be owned by root. If there are some other programs run in the container, such as Redis or PostgreSQL, they are under their own user which has the UID of 999. So do be aware that library in this context will not be readable or writeable to a regular user, it will require root.
Conclusion
That concludes this guide on the basics of Docker, as well as going into a bit more detail with Docker Compose and the networking side. You may be wondering what you should do next though. Honestly, see what applications float your boat, set them up and have a bit of fun with it all! If you're starting to get into self-hosting stuff, you may want a reverse proxy like NGINX or Caddy to set a site up to be publicly facing, and (depending on where you buy your domain from) set up Dynamic DNS to point to your address. I'll go over setting up a reverse proxy with a domain and Dynamic DNS in the future, but for now there's plenty of other tutorials for it.
If you have any questions or want to discuss some things, I have a forum page related to this post.